In this article, I’m going to tell you how to get the best possible portrait shots from your iPhone. I’ll also share with you some software I use; these apps are very well-loved by amateur and professional photographers alike.
There was a time I lugged my primary DSLR around with me everywhere I went. Out for dinner with friends, out and about in town, everywhere. The camera lived on my shoulder constantly but, the more time I spent shooting professionally, the less I was inclined to take my DSLR, opting instead to take various other smaller cameras for everyday photography; Canon G6, my beautiful old Nikkormat with 50mm 1.4 lens and a roll of Fuji BW film, even a twin lens reflex was smaller and easier to carry around!
Now I’ve been a professional photographer full-time for 4 years, and the only camera I ever take out with me when I’m not shooting for a client is my iPhone 4S.
The iPhone 4S camera is nothing to write home about, photographically speaking – of course. Without a large piece of glass in front of that sensor, it never will be.
But the point is: it’s good enough. Good enough that shooting portraits can be an enjoyable affair – quick, instant, and good results. The lens and the quality of the sensor are no more than adequate, which is precisely what you need from a tiny take-everywhere camera. The barriers to taking good portraits have mostly been removed; the process of shooting is no longer cumbersome as it was in previous generations of the phone, and I’m always able to predict the optical and digital quality of the images will be good, unlike many other camera phones I’ve used.
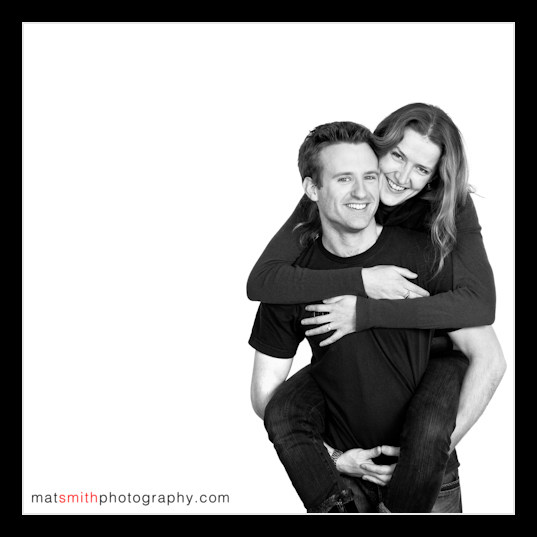
Here’s a shot I made yesterday on an unexpected visit to a coffee house in Amersham, where I unexpectedly met Claire and friends:

A portrait shot with the iPhone
4 Steps to great iPhone portrait photography
- As with all natural-light photography: find the light. Most of the time I don’t go out looking for it, but instead I see it and think “this is gorgeous light for a photo”. This usually happens when you aren’t expecting it: hence keep the iPhone to hand!
- Get an iPhone 4S or iPhone 5. The camera is far superior in the 4S to previous models. Also ensure you update your iPhone’s operating system. The latest version of iOS brought in some killer changes when it comes to shooting quickly. Read up here for more info.
- Adopt the mindset of a portrait photographer. Take fewer photos, delete all photos except the best version, start to think in terms of editing every shot as part of the process.
- Get the right apps. Process every photo you keep. This takes time, thought, and invention. The iPhone camera is not magic, it’s an automatic camera that makes assumptions about exposure. Every shot you take will require intervention with some kind of processing or photo editing.
Some apps I use
iPhonography is a fast-moving thing, so make sure to keep-up with the latest apps. I’m an incessant reader of reviews in the app store, and I research apps online a lot. Over the years I’ve purchased, downloaded, and tested tens of photo editing apps, but here’s a quick summary of the ones I always come back to.
Snapseed
 I’ve used this app every day over the last year.
This has been my favoured go-to app for almost every photo I’ve shot on the iPhone. Made by Nik Software, who have a good pedigree in professional photo editing software, the app combines some of the toy-like features of Instagram with some really decent manual editing functions. The Instagram-like photo filters are actually fully manual functions with presets and a randomize feature, which does provide some ‘playability’ if you aren’t sure what look and feel you are going for.
On the whole I avoid using Snapseed’s “vintage” or “grunge” filters as they are way too ‘Instagrammy’ – they detract from the purity of the image. My style is to accentuate and to make the image pop. I use “drama”, “crop”, “selective adjust”, and “tilt shift” a lot, though. I also use the “straighten” function to rotate images although I do find that a bit fiddly. More on how I use this app later.
Big lens
 Whereas Snapseed is about bringing out the best qualities of your photos, Big Lens is basically a naughty app for cheats. Don’t get me wrong – you have to put a lot of work in, and the results are very good, but it essentially emulates the look and feel of a big lens where you might stop-down the shot to reduce depth-of-field. Put simply it blurs out the background of your image. (Plus it does a whole load of other things.)
Every great portrait has a good separation of subject and surrounding.
By blurring out the background of your image, you are accentuating the subject and drawing the eye in to the photo. You are removing distractions from behind the subject which is something you can only usually do with a big piece of glass on the front of your camera. The app actually has “aperture” settings to emulate f stops (f3.5, f3.2, f2.8 etc.) although clearly these are to be ignored as, technically speaking, they are nonsense. Add to this the fact that it’s technically not a great idea to mask out a subject using a pen tool, and you’ll see why this app isn’t for photography purists – but I like it because it does give 95% great results a lot of the time, at least for portraiture.
What about camera apps?
The above are great for post-processing, but what about replacement apps for the iPhone’s camera?
Personally I don’t use one. I have a number of theories on this one, not least the fact that there’s a good chance you will inadvertently begin using an app that doesn’t support the resolution of the latest iPhone. It’s a huge flaw, but I’ve seen it before. App developers tend not to make a big thing of such flaws.
If you do prefer to use a special app for taking photos, instead of iPhone’s built-in app, then make sure you do your research. Find an app that definitely supports your iPhone camera’s resolution, and one that doesn’t attempt to make your images brighter. Apps that claim to make the image brighter are actually pre-processing apps; all they do is remove the options to fine-tune your photographs in post-processing afterwards.
How I process photos
The greatest thing about instant mobile photography is taking your image from start to finish without getting your desktop editing software out! You can do it all on the bus.
I’ve settled on a process I like, which gives my images a certain look and feel. I’d encourage you to find your own process to make images that suit your own eye – this is the key to becoming a great photographer.
That aside, here’s my process:
Settle on my image
I settle on my favourite image version by doing quick mock-up edits of a few different versions, cropping accordingly. I delete extra versions of the same shot and set about editing the chosen image.
Edit in Snapseed
I load the image up in Snapseed and straight away use the “drama” filter:


Use Drama filter
I’ll get the filter strength as high as possible without it looking to hyper-real (it gives a surreal bad-HDR effect if over-used).
I bring the saturation UP as it’s usually too low by default. Here I’ve used +54.

Set the saturation and strength of filter. Experiment with options.,
I make a note of the numbers and then try out different combinations of the two settings for this filter. I press-and-hold the top compare button a few times to decide whether I went over-the-top:

Always keep stopping to compare as you go
Then I apply the filter:

Click to apply the filter, before moving on to the next filter
Sometimes the image isn’t nearly bright enough. To fix this I tend to prefer using the “Tilt Shift” filter (instead of the “tune image” filter), as this has a really nice brightness algorithm. Although the image is exposed nicely here, I still use it to slightly push-up the brightness:

Use Tilt Shift instead of "Tune Image" - nicer algorithm for brightness
I use two fingers to pull-apart the Tilt Shift area, so that the diagonally opposite corners get a tiny amount of blur, and I tend to leave the other settings as they are. Perhaps I will tweak the saturation a little.
Next up, crop:

I prefer to crop and straighten as last step in Snapseed
I usually double-check my edits using the compare feature from the main screen (this time, press-and-hold the image. The compare button shown above is only when you are in one of the filter views).
All done! Now I save the image out to the camera roll.
Edit in Big Lens
Next I load the image into Big Lens. Always use “advanced” to mask the image:


Always use the manual / advanced mask technique
Now draw the brush around the subject. Then click Auto to tighten up the edges:

Make a rough drawing

Auto helps get your edges half good, but you need to edit them more
Zoom in to erase the mask where it shouldn’t be, and use the brush tool to re-apply if you removed too much:

Pinch to zoom, pan with two fingers, use brush and eraser
To pan around, use two fingers.
Be patient, this process takes a long time. If you mess up, it won’t look good. There’s an undo button you can use for brush strokes. You really need to be a little bit anal about this process. Don’t worry though, you can try it out and go back and edit the mask if you like.
Use the arrow top-right to move to the next stage. Now apply your aperture size.
You can see here, I’ve gone too far. This makes it look unnatural, and you can also see masking artefacts more, if you look around the edge of the subject:

Dodgy masking - either re-mask or lessen the blur effect
I went for f3.2 in the end. I also used the ‘pop cold’ filter, which only applies to the backdrop, to further draw the eye in. I turned the filter strength down to about half:

Add a filter if you like, but dial-down the settings
Again, use press and hold the compare function. Play around with the other options.
But there you have it: a great looking portrait from a tiny camera in your phone.
Before and After
Here’s a quick before and after comparison:

Comparison of image before and after processing


You must be logged in to post a comment.